AI Fashion Model Generator - Try Free, No Demo Call
AI Fashion Model Generator - Try Free, No Demo Call is a free AI tool. Put your clothing and products on photorealistic AI fashion models for e-commerce, lookbooks, and marketing. Start free in your browser - no demo call, no credit card.
Free to try · first generation free on signup · no credit card
Start by uploading image
Upload your image
Click to browse or drag & drop
Same face across every shot. All models are synthetic and free for commercial use.
Choose your transformation style
Upload a product photo — get a photo-realistic on-model shot. Pick a roster model below to keep the same face across shots.
Configure your options
Your AI Design Will Appear Here
Fill in the options on the left, then press Generate.
Attach an image, video or voice clip, then tell the AI what to do with it.
Upload your image
Drag & drop your file here or click to browse
What decides whether an on-model shot looks bought or looks made
The generator keeps what your photograph recorded and invents everything else. Almost every disappointing result traces back to that one sentence — either the upload did not record the detail, or the brief let the model invent something it should not have. These are the settings that decide which.
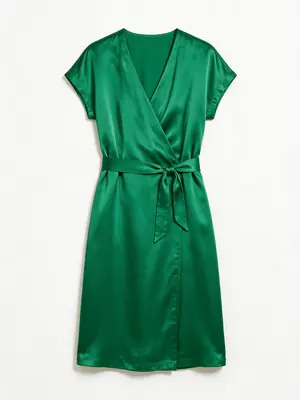
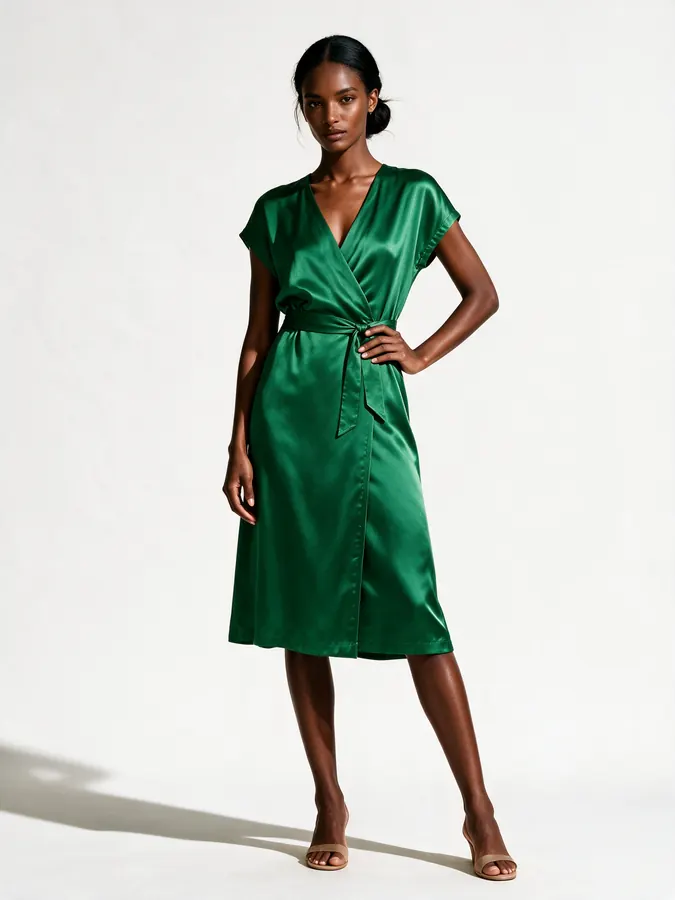
What carried over: the wrap front, the tie belt and its knot, the cap sleeve, the button placket down the skirt, and the specific green of the satin with its highlight breaking the same way. What is generated: the model, the studio sweep, the cast shadow, and the sandals — nothing in the upload said what shoes to use, so it chose. That is the rule in one image: brief the things you care about, because anything you leave out is a decision the model makes for you.
Three decisions that make or break an apparel generation
Flat and lit beats styled and moody
Lay the garment flat, square to the camera, with even light and no hard shadow across it, and let it fill the frame. Resist styling the upload — a folded cuff, an artfully draped hem or a prop laid on top removes information the generation needs. The tension worth knowing: the default mode is instructed to preserve your product exactly, so it is faithful to a good photograph and equally faithful to a bad one.
One variable per generation
Pose, background and lighting are three separate pickers, and changing all three between attempts tells you nothing about which one was wrong. Start at the defaults — Standing, Studio, Studio lighting — get one frame you believe, then move a single control. This also stops the most expensive habit on the page: re-rolling a full generation to fix something a smaller change would have fixed.
Check seams and edges before you check the face
The face is what your eye goes to and it is almost never the problem. Look at where the garment meets the body — the shoulder seam, the hem line, the waist, the point where a sleeve ends — because that is where an inaccurate render shows first, and it is also what a shopper unconsciously reads as real or not. Of the 36 photography styles, E-commerce is the one that asks for even lighting and true-to-life colour, which is what a primary listing image needs; Cinematic and Moody low-key are second-image styles.
The five poses you actually get, and when to leave them
Pose, background and photography style are picture grids rather than dropdowns. Two of them are long — 64 background plates grouped from Studio through Urban, Nature, Luxury and Home, and 36 photography styles — while the pose grid on the default mode is deliberately short at five presets, with Custom and Match photo tabs beside it. The 40-preset library sits behind Pose Set (Consistent Model), which is the mode to switch to when none of the five is the shot you want.
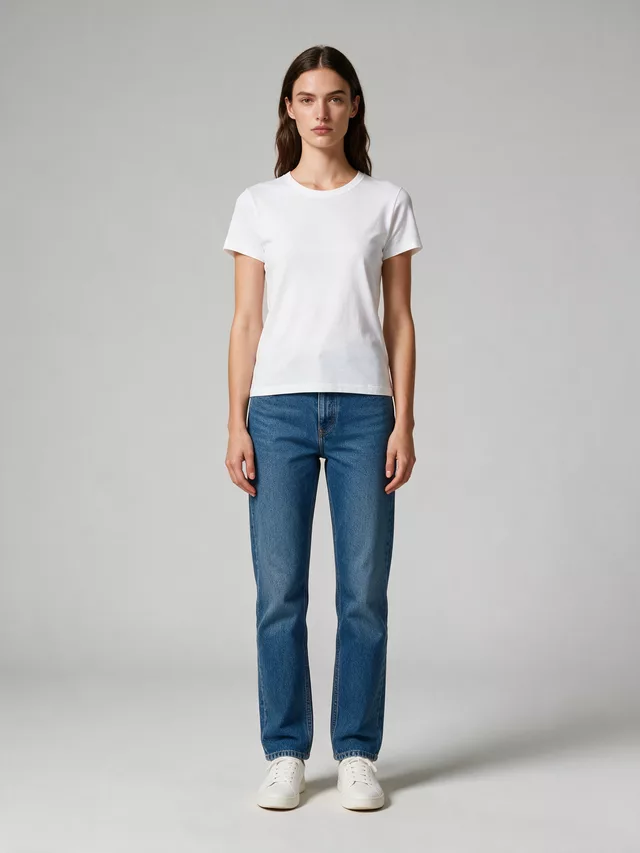
Symmetrical, evenly lit, nothing occluded. The dullest choice and the right one for the image a shopper judges the garment from.
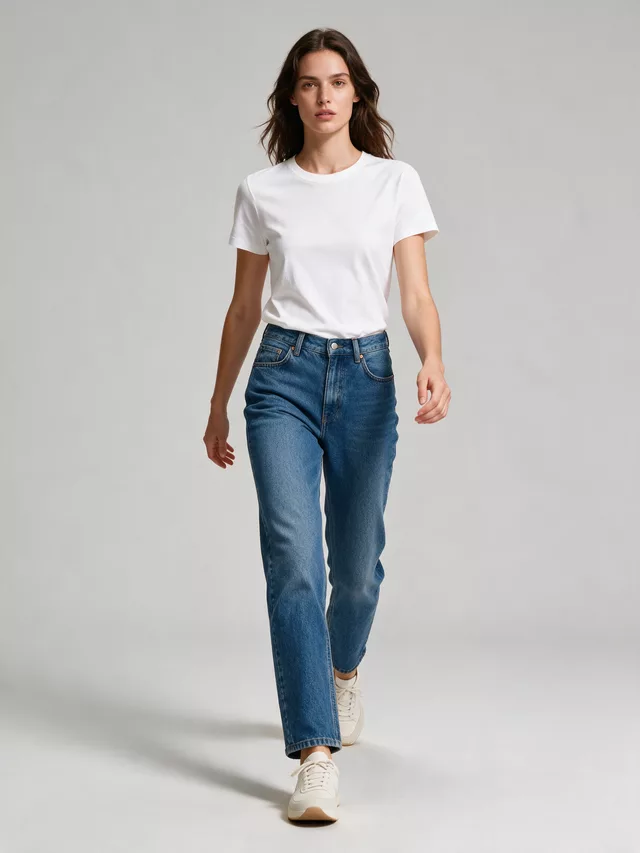
Motion opens a hem and shows how a fabric falls. Worth a credit for anything loose — dresses, coats, wide trousers — and wasted on a fitted tee.
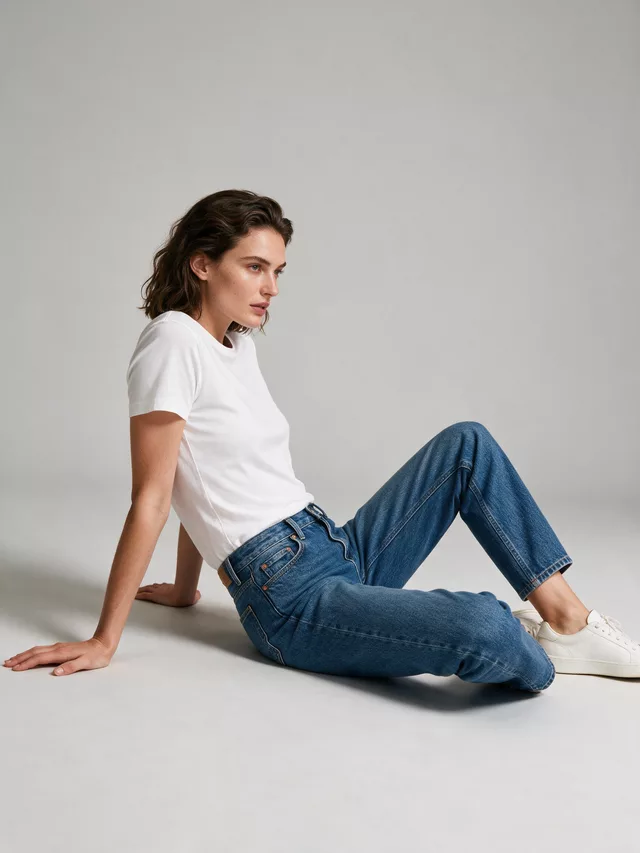
A seated frame folds the garment and buries the hem and the leg line. Good for showing a top inside a styled look, weak as a primary image.
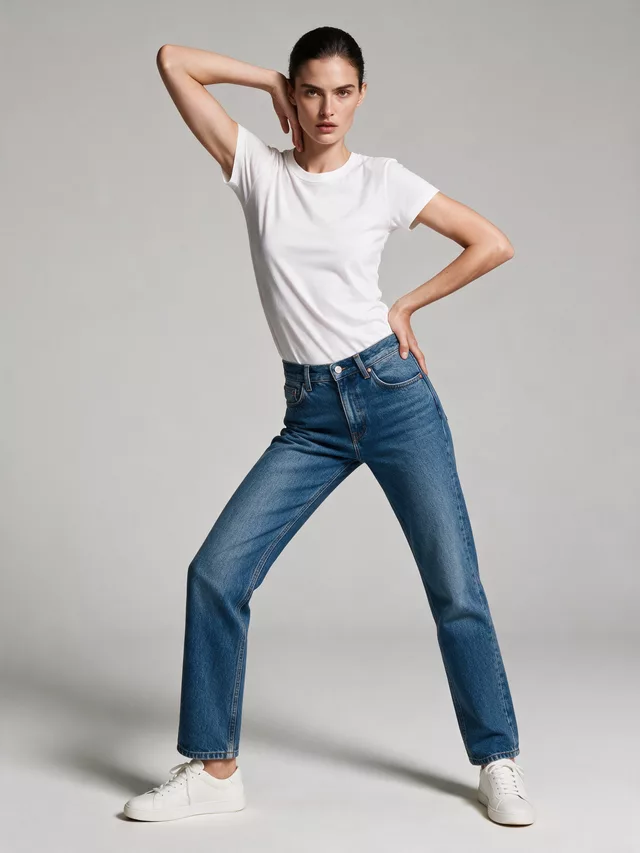
Angular posing is composed around the body shape, so where the garment lands is whatever the shape wanted. Use it once the product is already established.
| White studio | Default | What a marketplace primary image is expected to look like, and the plate almost every garment colour separates against. |
|---|---|---|
| Light gray | For white | The fix for white and cream garments, which lose their edge entirely against white studio. Its own description says it keeps white garments readable. |
| Golden hour | Second image | Warm low light flatters texture and shifts every neutral warm with it. Never the frame a shopper judges colour from. |
| Neon night | Recolours | Coloured light lands on the garment, not just behind it. A white shirt comes back magenta and the return rate finds out before you do. |
Questions clothing sellers ask before spending a credit
What should the photo I upload actually look like?
A flat lay or a mannequin shot, lit evenly, on a plain background, with the whole garment in frame and nothing cropped off. The default Product to Model mode is briefed to keep your product’s exact design, colours, materials and pattern rather than reinterpret them — which means it can only keep what your photograph recorded. A sleeve folded under itself in the upload is a sleeve the generation has to invent.
The model came out fine but the garment changed slightly. Why?
Two usual causes. The first is a soft or shadowed upload: fine detail — a rib pattern, a topstitch line, a button shape — has to be legible in your photo before it can survive into the output. The second is your own brief. By default your prompt is passed through a rewrite before the image model sees it, which helps a vague one-liner and hurts a precise one. Open Advanced Options and untick "Let AI improve my prompt" when your brief is already exact; the checkbox says plainly that off means it is sent as written.
How do I keep the same model across a whole catalog?
Pick a model from the roster before you generate — the Product to Model panel says it directly: pick a roster model to keep the same face across shots. For a second angle on a shot you already like, Pose Set (Consistent Model) takes your previous result as the reference and holds the face, hair, body type and the garment’s cut and pattern while only the pose changes. Each pose you tick in that mode is billed as its own generation.
Which background should a first listing image use?
White studio. It is what marketplaces expect on a primary image and it separates cleanly from almost every garment colour. The picker holds 64 plates grouped from Studio through Urban, Nature, Luxury and Home, and those are for the second and third images — once the shopper already knows the shape and the colour, a Loft or a Rooftop plate sells the context. Judging colour from a Golden hour frame is the common mistake: it warms every neutral.
Can I show the same garment on more than one body type?
Yes, and for apparel it is worth the credits. Generate the same upload on two or three different model descriptions and you answer the fit question that drives most clothing returns. The Main mode carries the fullest set of model controls — gender, age, skin tone, hair, expression — if you want to fix those precisely rather than describe them in a sentence.
What is the difference between the modes on this page?
Product to Model is the default and the one that locks onto your uploaded product. Multi-Pose Pack returns one image holding three panels of the same model — full-body front, walking, and a waist-up close-up. Pose Set (Consistent Model) produces a set: each pose becomes its own full-size generation with the model and garment held consistent, billed separately. Product Detail Shot is the opposite end — it describes the product in words rather than locking onto your upload, and is for close crops where framing matters more than exact reproduction.
Does it work for menswear and kidswear too?
Yes, and both have their own pages with the settings that suit them. The workflow is identical: upload the garment, describe who wears it, pick the pose and plate.
Related tools, and why you would switch
Same face across every shot. All models are synthetic and free for commercial use.
Upload a product photo — get a photo-realistic on-model shot. Pick a roster model below to keep the same face across shots.