
How to use Hair Styles on AI Two
Preview new hair styles on fashion model photos with Hair Styles in Fashion Studio.
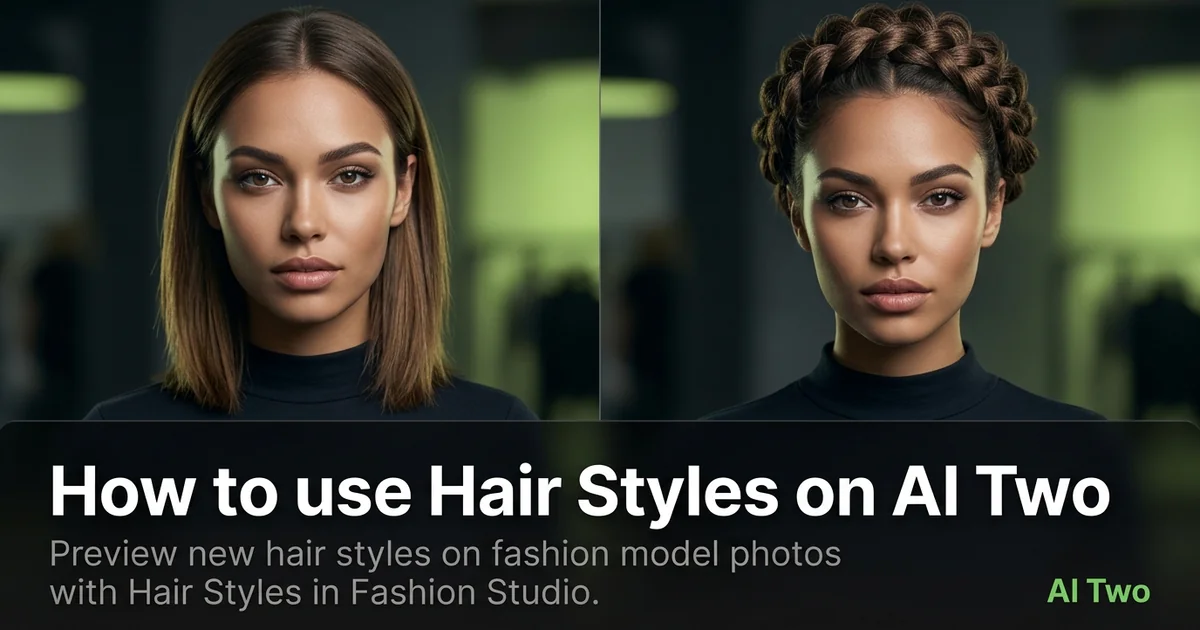
Hair Styles on AI Two is the Fashion Studio post production page I open when a brand or agency needs visual drafts of cut, color, and volume direction on an approved model photo before booking salon time on set. Apparel and cosmetics sellers use it to align casting, wardrobe, and hair mood for lookbooks and campaign boards, not to play dress up on a selfie at home. When I tested a bob length shift on a studio portrait with even lighting, the hairline and part stayed believable enough to email the creative director the same afternoon. I treat the download as shoot direction art for seller campaigns, not a promise of how every strand will look under live wind on location. Credits meter each generation. Free signup credits covered several length tests for me on one hero frame before I batched variants on a paid plan. Most runs finish in about 30 seconds after Generate.
What Hair Styles does
Upload a model portrait or follow the form, choose hair direction options, and generate a still that previews length, texture, and color cues on the existing face and lighting.
When I tested a soft wave on a ecommerce model frame, the output kept ear and jaw alignment readable so merchandising could compare against the wardrobe pull.
Fashion Studio lists this beside makeup editor, beauty cosmetics, portrait retouching, background remover, and image upscaler in the post production cluster.
Built for sellers and studios who need hair direction on model photos for casting and retouch planning, not for consumer try on selfies.
I open this page after the base portrait is approved for skin tone and lighting. A muddy source photo copies noise into the hair preview.
Free signup credits covered early direction boards for me. Paid plans raise monthly limits for seasonal campaign batches.
In my experience, frontal or three quarter portraits with clear hair edges beat heavy motion blur from runway snaps.
I keep the original unretouched file in the SKU or campaign folder beside every hair variant.
For color tests I note the target swatch in the project brief so the team compares outputs against the same reference chip.
I name exports by look number and date so the creative folder does not mix discarded directions with approved ones.
When the brief also needs lip or eye changes, I finish hair direction first, then open Makeup Editor so one variable moves at a time.
How to run it step by step
Step one: sign in or create a free account. Step two: upload a sharp model portrait with hair visible in frame. Step three: pick hair direction options, keep defaults on run one. Step four: generate and wait about 30 seconds. Step five: download or adjust one setting and compare.
Keep originals for each campaign. Seasonal drops reuse the same model frame across color stories.
When I tested a pixie direction, I checked hairline detail at full zoom before I sent the board to the stylist.
I run the hero look first, then batch length or color variants once framing is locked.
Credits apply per generation, so I lock one portrait crop before I batch five directions.
If texture looks painted, I reshoot or pick a cleaner source instead of stacking more runs on a noisy file.
I export the hair preview at full zoom checked resolution before I open portrait retouching for skin cleanup on the approved direction.
When the model wears a branded cap or hood in the source, I remove or reshoot first so the tool has enough hair area to read.
My second run only changes length or color after edge detail passes. Changing both at once hides which control helped.
I paste the winning look number into the call sheet so on set styling matches the board the client approved.
Which photo works best
Even studio light or soft window light shows hair texture better than harsh on camera flash behind the subject.
Choose a portrait where ears, forehead, and shoulders are visible when the brief includes updos or short cuts.
Match the framing on the Fashion Studio before and after card for this tool.
Avoid heavy beauty filters on the source portrait. The hair preview inherits smoothed skin and odd color casts.
For dark hair on dark backgrounds, add separation light or a lighter backdrop so edges stay readable.
For blond or gray hair, watch for blown highlights in the source. Recovery is harder than reshooting with softer exposure.
Include enough top of head in frame for volume changes. Tight crops clip bun or puff directions.
Remove stray production tape and clip markers from the hairline when you can. They copy into the preview and distract in client reviews.
Shoot at higher resolution when you plan tight crops for email boards. Soft phone exports fall apart on fine flyaway detail.
Mistakes I avoid
Uploading a consumer bathroom selfie when the brief needs an approved model portrait for a seller campaign.
Changing hair length, color, and makeup together on run one.
Expecting live salon precision from a direction board tool. I still book the stylist for the shoot day.
Batching five color stories from one blurry backstage snap.
Skipping hairline and part checks. That is where creative directors look first when they compare directions.
Sending only the AI still to talent without the original portrait. They need both to judge face framing and wardrobe balance.
When to use another Fashion tool
Need lip, eye, or complexion changes on the same portrait? Makeup Editor. Need product stills for cosmetics SKUs? Beauty Cosmetics. Need skin cleanup after direction is approved? Portrait Retouching. Need a clean backdrop for the board export? Background Remover. Need sharper flyaways for print? Image Upscaler.
The post production cluster guide maps sibling pages. The Fashion Studio pillar covers casting and ecommerce when the job moves from boards to packshots.
Open Beauty Cosmetics when the hero asset is a bottle or compact rather than hair on a model.
If the brief is full body apparel on model, finish casting photography first, then return here for hair direction on the approved frame.
After the download
I attach the original portrait beside each hair variant in the campaign folder so the client compares face framing at the same zoom.
For stylist calls I export a contact sheet with look numbers in the margin so phone reviews stay organized.
When a direction wins, I star that file in the DAM and paste the look number into the production schedule.
If flyaways soften on export, I return to the sharpest source and rerun with a smaller style nudge rather than stacking fixes on a soft file.
I screenshot the form labels that worked and paste them into the creative brief so reshoot day matches the approved hair direction without guessing.
FAQs
Related studio guides
How to use Makeup Editor on AI Two
Preview makeup looks on fashion model photos with Makeup Editor in Fashion Studio.
Read guide
How to use Beauty and Cosmetics on AI Two
Preview beauty and cosmetics looks on fashion catalog photos with Beauty and Cosmetics in Fashion Studio post production.
Read guide
How to use Background Remover on AI Two
Cut catalog photos to a clean white or custom background with Background Remover in Fashion Studio post production.
Read guide